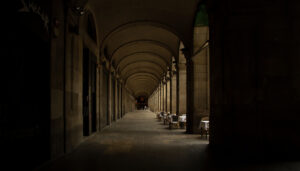
Open-plan offices present unique lighting challenges. Without proper glare control, employees struggle with eye strain, reduced productivity, and general discomfort throughout their workday. The Unified Glare Rating (UGR) provides a standardized method to measure and control this problem.
We set out a practical path to control glare in open-plan offices so occupants see clearly and feel comfortable. The unified glare rating is an installation metric, not a product label, and that changes how we design lighting layouts.
UGR isn’t just a number on a product specification sheet—it’s a comprehensive assessment of how your entire lighting installation performs in a real space. This distinction matters because the same luminaire can produce vastly different glare levels depending on its placement, the room’s dimensions, surface finishes, and viewing angles.
The calculation considers multiple factors: the brightness of light sources, their position relative to occupants’ sight lines, the room’s background luminance, and the solid angle each light source occupies in a person’s field of view.
This complexity means you can’t simply buy “low UGR” fixtures and expect good results without proper planning.Our approach links glare rating to real outcomes: task accuracy, perceived quality and a calm visual environment. Practical moves include lifting background light with uplight, narrowing beams, recessing fittings and spacing more lamps to keep uniformity.
Throughout this guide we balance energy, occupant wellbeing and maintainability. By modelling, testing and tuning on site, we deliver lighting design that meets ugr compliance while keeping spaces bright and welcoming.
What is UGR and why glare control matters in today’s offices
Understanding how bright sources sit against their background is the first step to better office lighting. Unified glare rating quantifies discomfort glare by comparing the luminance of fittings in the field of view to the background luminance seen by an observer.
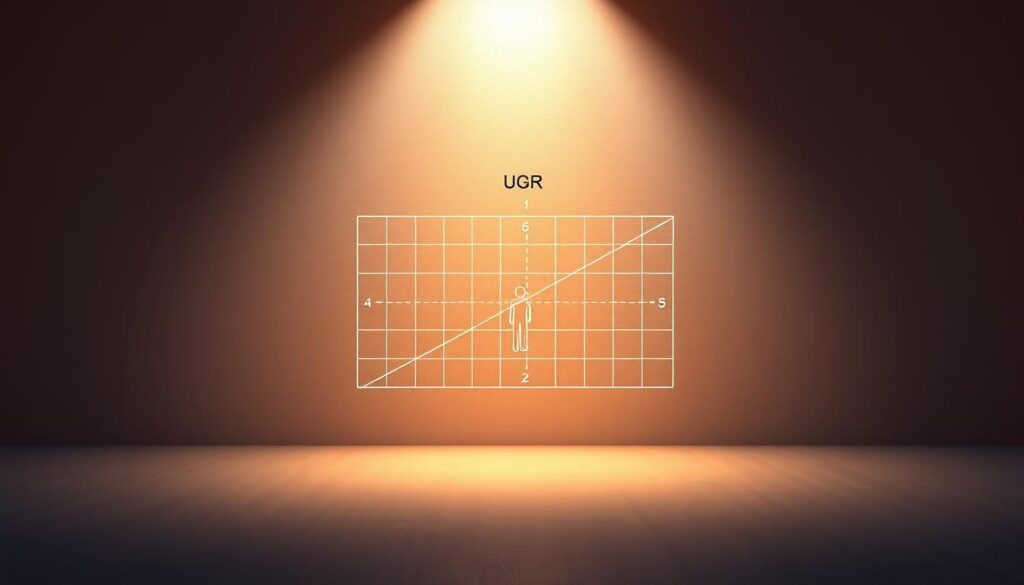
Unified Glare Rating explained: from 5 (very low) to 40 (extremely high)
The scale runs from 5 (almost imperceptible) to 40 (extreme). Standards such as BS EN 12464-1 commonly recommend an UGR value below 19 for general office tasks.
Visual comfort, productivity and wellbeing
Glare affects the eye, causing strain, headaches and slower task performance. Controlling glare improves focus and reduces errors for occupants.
The difference between direct glare and background luminance
Direct glare comes from the luminaire itself. Background luminance—brighter ceilings or walls—lowers perceived contrast and can reduce discomfort glare.
- Formula factors include source luminance, background luminance and observer position without heavy maths.
- The same light fitting can produce different glare rating values depending on room finishes, layout and viewing direction.
- UGR applies only to interior installations and is installation‑specific, not a property of the fitting alone.
Standards and recommended UGR levels for UK workplaces
Standards give us practical touchstones for reducing glare in offices.
BS EN 12464-1 lists maximum unified glare limits across more than 280 interior uses. For general workstations and meeting rooms the typical target is UGR < 19. That target helps designers balance task lighting, background luminance and occupant comfort.
These values are recommendations rather than statutory law in the UK. Yet they are widely accepted as good practice. Clients, specifications and bodies such as the SLL often expect designs to meet the stated levels.
Practical implications for design and handover
We treat the glare rating target as one of several checks alongside illuminance, uniformity and CRI. Different office environments—focus zones, collaboration areas or hot‑desks—may require different targets. Tighter values (for example, ugr ≤ 16) are reasonable where precision tasks or sensitive users demand it.
- State targets in briefs and show evidence with calculation summaries and observer positions.
- Document UGR tables, assumptions and tolerances in the handover pack.
- Remember finishes, furniture and screens affect final values as much as fittings.
| Space type | Typical target | When to tighten |
|---|---|---|
| General office / desks | UGR < 19 | Task screens or concentrated work |
| Meeting rooms | UGR < 19 | Video conferencing or presentation screens |
| Control rooms / precision | UGR ≤ 16 | Highly detailed visual tasks |
How UGR is calculated in lighting design
A reliable glare calculation depends on accurate photometry, realistic finishes and defined observer points. We feed modelling tools with precise inputs so the result reflects the installation, not a product claim.
Core inputs that steer a result
The calculation formula uses luminaire photometry (IES/LDT), room dimensions and surface reflectances.
Number of fittings, spacing and mounting heights set illuminance and affect glare outcomes.
Workflow in Relux, Dialux and AGi32
Create the layout, import photometry, assign reflectance values and place observer points. The software then gives an ugr calculated for each view direction.
Observer position and limits
The observer’s seat and gaze change the numbers. Rotate the view or move the desk and the ugr value will shift.
Note: This metric is valid only for interior installations and is never a fixed property of a single luminaire.
| Input | Effect on result | Design tip |
|---|---|---|
| Room proportions | Alter background luminance | Model realistic furniture and finishes |
| Number / spacing / heights | Change illuminance uniformity and perceived glare | Adjust spacing or lower mounting height to reduce contrast |
| Photometry & reflectances | Drive source luminance and background | Use manufacturer IES files and measured reflectance values |
UGR compliance in open-plan offices
Open-plan rooms change how we manage glare because geometry and furniture steer sightlines and contrast.
Open-plan geometry, ceiling height and desk layouts
Wide, shallow spaces with low ceilings limit optical options. They push bright fittings into direct view and raise perceived glare.
We map desk blocks and sightlines to avoid placing luminaires on screen‑facing axes. Rotating runs or staggering fixtures keeps bright emitters out of direct view.
Background luminance and surface reflectances
Raising background luminance by brightening ceilings and walls reduces contrast and eases discomfort.
We favour higher ceiling reflectance and matte mid‑tone walls to lift the background without creating specular glare.
Number of luminaires, spacing ratios and mounting heights
Lower output per fitting, more units and tighter spacing often give a more uniform, low glare result.
Suspended lines with controlled cut‑off and modest uplight lighten the ceiling plane. Adjusting suspension heights helps keep bright sources outside typical sightlines.
- Design tip: Use narrower beams plus more fixtures at reduced output to reduce glare while maintaining uniformity.
- Plan around services: Route trays and sprinklers to avoid forcing fittings into problematic positions.
Selecting luminaires and optics to achieve low glare
A luminaire’s distribution and how its installed impact whether a space feels calm or harsh.
There is no such thing as a “UGR<19 product” in isolation. Products can help, but installation geometry, ceilings and observer position set the final unified glare result. We always validate in software using manufacturer photometry.
Optical controls that work:
- Cut‑off shielding and deep regress to hide the light source from common sightlines.
- Micro‑prisms or lenses that limit lateral output and lower perceived intensity at high angles.
- Narrower beams where we need to reduce bright oblique views; batwing or wide optics where uniformity matters.
Practical moves: lower output per fitting and increase counts to keep uniformity while reducing glare. Add modest uplight to lift ceiling luminance and reduce contrast without harming task illuminance.
Finally, check ageing and dirt on lenses, confirm selections with IES files and run UGR views in Dialux or Relux. That validation keeps visual quality, energy and aesthetics in balance.
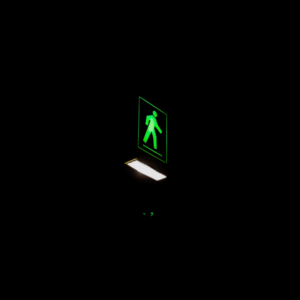
Practical glare control strategies for open-plan environments
We focus on what occupants actually see and then shape the lighting to suit those view directions. That human‑centred design keeps the office productive and reduces visual strain.
Plan around observers
Lay out fittings so they are outside typical sightlines and away from screen reflections. Rotate runs and align banks parallel to the main sightlines to cut direct views of bright sources.
Balance beam angles, wattage and count
Pair moderate beam angles with sensible wattage and a slightly higher luminaire count. More fixtures at lower output give uniform light and fewer harsh hot spots.
Use indirect lighting and surface strategy
Introduce uplight and keep ceilings brighter to lift background luminance. Specify high ceiling reflectance, mid‑tone matte walls and low‑gloss desks to achieve a low glare environment.
Controls and testing
Dimming, daylight harvesting and task tuning let you hold acceptable levels through the day. Test desk orientations and screen positions in Relux or Dialux to verify observer comfort and to reduce ugr in real scenarios.
- Brief installers: aiming, suspension heights and alignment tolerances matter.
- Coordinate with IT: place screens to avoid specular reflections.
- Document scenes: provide simple handover guides so facilities can maintain low glare settings.
Verifying results and avoiding common UGR pitfalls
A lighting model is only the start; real rooms and people often change the numbers.
Design versus reality
Paint colours, furniture and monitor positions alter visual contrast and can push glare readings above target values. Glossy surfaces and very dark fabrics are frequent offenders.
Good practice: record all finish and furniture choices in the design pack so the initial calculation remains traceable.
Post-occupancy checks
After handover we measure key observer points, re-simulate affected views and confirm the ugr levels. Small tweaks — aiming, dimming or local shielding — often solve hotspots quickly.
Coordination across disciplines
We work with interiors, IT and facilities so screens, desks and paint keep the environment within expected ratings. Involve occupants with short comfort surveys to catch issues that numbers may miss.
Document assumptions, keep calculation inputs clear and train facilities to maintain optic cleanliness. That keeps lighting quality steady and makes any future rating checks straightforward.
Conclusion
Delivering low glare across a wide office requires discipline in layout, optics and on‑site checks.
Practical moves — better background brightness, recessing fittings, narrowing beams and adjusting output and spacing — tame glare and protect the eye.
Products help, but only a complete lighting design locks in the rating we want. We verify on site, keep solutions maintainable and brief teams early so standards and compliance are met from day one.
FAQ
What is the Unified Glare Rating and why does glare control matter in open‑plan offices?
The Unified Glare Rating is a numerical way to judge discomfort from bright light sources in a visual field. It links luminaire luminance, observer position and background luminance to give a single glare value. In open‑plan offices, controlling glare reduces eye strain, improves task quality and boosts productivity and wellbeing. Poor glare control also increases complaints and can erode perceived lighting quality.
How do UGR values scale — what does a low or high value mean?
UGR is expressed on a scale where lower numbers mean less perceived glare. Typical ranges run from about 5 (very low glare) up to 40 (very uncomfortable). Designers commonly target values below 19 in offices, but the right target depends on tasks, monitor use and client expectations.
Is a luminaire’s UGR value fixed for all installations?
No. A UGR figure quoted by a manufacturer is only valid for the specific room geometry, reflectances and observer position used in the test. Installation factors — ceiling height, surface reflectance, luminaire spacing and view direction — all change the calculated glare rating.
Are UGR limits mandatory under UK standards?
UGR limits are recommended in standards such as BS EN 12464‑1 but not universally law. They represent good practice and client expectations for visual comfort. Employers must still ensure a safe, healthy visual environment; adhering to standard UGR targets is a common way to demonstrate that.
What inputs determine a calculated UGR value in lighting design software?
Key inputs include luminance distribution from the luminaire (photometry), room geometry, surface reflectances of ceilings, walls and floors, spacing and mounting heights, and the observer’s position and viewing direction. Tools like Relux, DIALux and AGi32 use these values to compute the UGR.
How does background luminance affect glare?
Background luminance sets the contrast between the luminaire and surroundings. Raising background levels — for example with uplight or brighter ceilings — reduces contrast and therefore perceived glare. Surface reflectances play directly into that background luminance.
What are practical strategies to achieve low glare in an open‑plan layout?
Plan around observers: orient fittings to avoid direct line‑of‑sight into the light source and minimise screen reflections. Use optical control — narrow beams, shielding, louvres or recessed sources — and include uplight to lift background luminance. Balance the number of luminaires, beam angles and mounting heights for uniformity, and add dimming or task tuning for different activities.
Can changing furniture or paint colours affect UGR after installation?
Absolutely. Real‑world factors — paint shades, furniture finishes and monitor positions — can shift background reflectances and observer views, altering the glare rating from the design prediction. That’s why post‑occupancy checks and re‑simulation are important.
How should we use lighting software to verify glare performance?
Model the exact room geometry, input measured reflectances, use certified photometric files for luminaires and set realistic observer positions and viewing directions. Run UGR calculations across representative workstations and screen heights. If results exceed targets, adjust optics, spacing or add uplight and re‑run the simulation.
What limits apply to using UGR — where does it fall short?
UGR only covers interior applications and discomfort glare for a seated observer; it’s not a property of a fitting in isolation. It also doesn’t capture disability glare for people with visual impairments nor dynamic effects from glare caused by moving light sources. Use UGR alongside other metrics and real‑world checks.
How many luminaires and what spacing ratio typically helps reduce glare?
There’s no one‑size‑fits‑all number; spacing ratios and counts depend on ceiling height, luminaire beam angle and room reflectances. As a rule, tighter spacing with controlled optics and proper mounting height improves uniformity and keeps individual source luminance lower in the field of view, reducing the glare rating.
Are there product choices that reliably produce low glare?
Some products are designed with strong optical control — deep reflectors, micro‑prismatic lenses, or fully recessed LED modules — and can help achieve low glare. But remember: installation, surface reflectances and observer positions determine the final rating. Specify controlled optics and test in the intended environment.
What role do lighting controls play in managing glare?
Dimming and task tuning reduce source luminance and can quickly bring UGR into acceptable ranges for different activities. Zoned controls and presence sensors allow higher light levels where needed and lower levels elsewhere, helping balance energy efficiency with occupant comfort.
How do we coordinate across disciplines to keep glare under control?
Early collaboration between lighting designers, interior architects, IT and facilities is essential. Agree on surface finishes, screen positions and furniture layouts during design. Include UGR checks in procurement and post‑installation commissioning so the lighting solution stays effective once the space is furnished and occupied.